
Back to top
To view on your phone or desktop, go to user guides at www.amazon.com/devicesupport.
Welcome to your new Kindle Scribe. This short guide will familiarize you with all of the features and functionality of your Kindle. Some Kindle features may not be available based on your country of residence or location. Please visit www.amazon.com/devicesupport for more information about specific features. Note that Audible-enabled devices are not available in all countries, including China.
Setting up your Kindle Scribe takes a few simple steps:
Set up with your phone: This device can use Simple Setup to use the Kindle app on your iOS or Android device to register your Kindle. To do this, you will need the following:
Your Kindle phone app will automatically detect your Amazon account and any previously saved Wi-Fi passwords to help with setup.
To set up a Bluetooth audio device when using VoiceView, visit VoiceView screen reader.
If you aren't signed in, select Register your Kindle from the Home screen, and follow the onscreen prompts. To verify, go to Settings and check the registered user's name under Your Account. If you don't see the intended account, tap Your Account, then Register/Deregister Device. If you have enabled Sign in Approval, you will need to enter your passcode followed by the security code sent to your phone when you register the device.
If you have difficulty connecting to your wireless network or need more information, see Network Connectivity. Once you have completed the setup process, Set Up Your Kindle will no longer appear on your Home screen.

Power button: To turn your Kindle on, press the Power button located on the same edge as the charging port. If you need to turn off your Kindle screen, press and hold the Power button for 9 seconds until the Power dialog box displays and then tap Screen Off.
Your Kindle will automatically go into sleep mode after a few minutes of inactivity and a screensaver displays. This static screensaver uses no battery power. To put your Kindle in sleep mode, press and release the Power button. To wake up your Kindle, press and release the Power button.
If your Kindle does not power on or is unresponsive during use and you need to restart it, press and hold the Power button for 9 seconds until the Power dialog box displays and then tap Restart. If the Power dialog box does not display, press and hold the Power button for 15 seconds or until the LED near the charging port stops blinking.
USB-C/power port: You can use the supplied USB-C cable to connect your Kindle to a computer for charging the battery. You can also use the USB-C cable to transfer files to your Kindle. To charge your Kindle from a power outlet, you will need the Amazon 5W charger (sold separately) for the USB-C cable.
When charging, a lightning bolt appears on the battery status indicator at the top of the Home screen. The charge indicator light will turn amber while the battery is charging and green when it is fully charged. Charging should take less than two hours using the Amazon 5W charger (sold separately). Charging using third-party adapters or from a computer's USB port should take less than three hours, but may take longer depending on the capability of the hardware. Please view Safety & Compliance in the More > Legal section for information regarding use with other USB-C cables and power adapters.
Your Kindle is not usable as a reading device while in USB drive mode. To read a book while charging the battery, you must eject the Kindle from your computer's desktop. To do so, click the Disconnect button on your Kindle.
Your Kindle will then exit USB drive mode, but will continue to charge. If the charge indicator light does not come on, make sure that the USB-C cable is fully inserted into your Kindle and into the USB port of the computer. If your Kindle is still not charging, try another USB port or power outlet.
Note that if your Kindle is plugged into a low-powered USB port—such as those found on some keyboards and older computers—it will not receive enough power to charge.
If your Kindle is exposed to water or other liquids, follow the care instructions in Safety & Compliance in the More > Legal section.
Your Kindle Scribe has an onscreen keyboard. When you tap within the Search field or begin other actions that require you to type in information, the keyboard automatically displays at the bottom of the screen. Tap the keys to enter your selection and use the appropriate buttons to continue on to the next action. As you type, word suggestions based upon your entries display above the keyboard. Tap the word you want to select.
Tips:
 to enter numbers or symbols.
 to return to the regular keyboard.
 to enter uppercase characters. Tap the Shift key twice to enter all-cap mode, and tap it once to exit the mode.
  . On the Settings page, tap Language & Dictionaries, then Keyboards.
 is added to your keyboard when you have enabled multiple languages in settings. To select a different keyboard, tap the Globe key.
Books, magazines, and other materials are delivered directly to your Kindle via its built-in network connectivity. Your Kindle can connect to your home Wi-Fi network or to hotspots located around the world, including libraries, coffee shops, and airports. Connecting to Guest, Hotel or Airline Hotspot networks may require a special sign-in using a special password, OTP or voucher codes. You may need to contact the Hotspot network provider for more details.
Kindle devices launched before 2021 support 2.4Ghz band and security type up to WPA2. Later devices support 2.4Ghz and 5Ghz bands with security types WPA3 and OWE for increased network performance and security.
This device has Wi-Fi simple setup to automatically connect to your home Wi-Fi network. For Wi-Fi simple setup to happen, you need three things: 1) this Kindle Scribe 2) an existing Amazon device that is already connected to your Wi-Fi network (such as a second generation or newer Echo, Echo Plus, Echo Dot, or Echo Show device in your home that is already connected to your Wi-Fi network), and 3) a Wi-Fi password saved to Amazon. If you do not have these three things, then the device will ask you to connect to a wireless network.
Connecting manually:
.Tips:
 .
.When connecting to a Wi-Fi network, you can choose to save your Wi-Fi password to Amazon. Once saved, we can configure your compatible devices so that you will not need to re-enter your Wi-Fi passwords for each device. Your Wi-Fi passwords are sent over a secured connection and are stored in an encrypted file on an Amazon server. Amazon may use your Wi-Fi passwords to connect your compatible devices but will not share them with any third party without your permission. Amazon handles any information it receives, including your Wi-Fi passwords, in accordance with the Amazon.com Privacy Notice.
To opt out of this feature, verify that the Save password to Amazon option is not selected when you enter your network password.
To change your Wi-Fi password in the future, perform the Wi-Fi setup process again from your Kindle. Once reconnected to your Wi-Fi network, your updated Wi-Fi password will be automatically saved to Amazon (if you have not opted out of this feature).
To delete any Wi-Fi passwords that you have saved from this device:
.Outside of notebooks, you can use the Pen to swipe or tap like a finger to turn pages or navigate on screen. The nib may become worn over time, and will need to be replaced.

The Premium Pen has a side button, and an eraser. The eraser can be used to erase marks without needing to select the eraser tool in the writing toolbar.
The side button is a “shortcut button” that allows you to temporarily switch to another writing tool while holding the button. To configure the shortcut button, go to More > Settings > Pen Settings > Shortcut Button and choose a shortcut tool. While taking notes, press and hold the button, then put your Pen nib on the screen to use the selected shortcut tool. Note: If the shortcut tool you’ve configured does not appear in the writing toolbar for the current content type, pressing and holding the button won’t activate that tool.
The VoiceView screen reader enables you to navigate your Kindle using special gestures, receive voice guidance when you interact with items on the screen, and listen to millions of books. You can pair a Bluetooth audio device for use with the VoiceView screen reader when setting up your Kindle.
Please read all instructions before starting setup, then reference them as needed. There will be no audio announcement or feedback until the last step.
Troubleshooting: If you do not hear audio from your Bluetooth device, confirm your Bluetooth audio device is in pairing mode and repeat step 4.
Once your audio device is connected and VoiceView is enabled for the first time, the VoiceView tutorial will begin. You will also be prompted to complete setup, including connecting to a wireless network and registering your Kindle.
To turn on VoiceView after setup, first make sure your Bluetooth audio device is on before waking your Kindle from suspend using the Power button. Next, press the Power button 3 times. VoiceView audio will resume after 6 seconds. You can also turn VoiceView on and off in Settings. To manage VoiceView screen reader settings, open the Quick Actions menu, then tap All Settings . On the Settings page, tap Accessibility. If VoiceView is currently enabled the All Settings option in Quick Actions will change to VoiceView Settings.
Your Kindle uses a high-resolution display technology called electronic paper. The display is reflective, which means you can read it clearly even in bright sunlight. Electronic paper uses ink just like books and newspapers, but it displays the ink particles electronically. On occasion, your screen may flash the entire screen. This the device refreshing the e-reader page display, and is a normal part of the screen's function. By default, your Kindle features fast, smooth page turns, minimizing the number of page refreshes.
Your Kindle Scribe features a touchscreen interface that enables you to perform many tasks with just a tap or swipe of a finger. To select an item, simply tap it. For example, tap a book cover or title to open the book, or tap the overflow menu ( ) on the item's cover to view available actions. The Home and the Library can be accessed by the bottom navigation bar.

Tap the Search icon  to initiate a search and display the onscreen keyboard. When you search from the Home screen, the default search is your library and the Kindle and Audible stores. To initiate a full search and view results from your library, Kindle Store, Audible Store, Text in Books, Dictionary, Notebooks, and Wikipedia, tap the Search Everywhere option that appears as you type in the search criteria.
Tips:
The Search option also displays when you select a table or image and highlight a word or passage in book.
To exit search, tap the  on the right side of the search bar.
Create note: Quickly create a notebook by tapping the  icon.
icon.
Store: Tap to go to the Kindle Store and access the Audible Store (not available in all countries). Your Kindle must have an active Wi-Fi connection to use this feature.
The Kindle Home screen has four tabs, and your most recently opened book, or notebook:
The Kindle Home tab has two sections:
Your Kindle can store books, audiobooks, personal documents, newspapers, blogs, and magazines, which are referred to collectively as "content" throughout this guide. By default, all of your content in the Cloud and on your device displays in the Library tab. Items that have been downloaded to your Kindle display a check mark in the lower left corner of the cover image when in Grid view and on the right side of the screen when in List view. To view just the content downloaded to your Kindle, tap the filter menu in the top left and select Downloaded.
You can view content on your library screen using the default Grid view, which displays the periodical or book cover, by List view, which displays book information, or by Collections view, which displays your created collections. To change this preference, tap  in the top right, then select Grid, List, or Collections view.
Your notebooks and folders are available in the Notebooks tab. Each notebook is represented by a notebook cover and notebook name, with the number of the most recent page you have written in and the total number of pages in the notebook under the notebook name. Similarly, folders are represented by a folder icon, along with its name and number of items in the folder. Your notebook and folder structure are synced in the Cloud unless you are disconnected from the Internet or have turned off Sync.
To access more options for your notebooks and folders, tap the overflow menu (the three dot icon) on the item's cover when in Grid view or on the right side of the screen when in List view. These options include renaming, moving or deleting. Some of these options will not be available depending on whether you're connected online or if you have Sync disabled.
This tab contains helpful options, including Your Lists, Goodreads Shelves, Web Browser, Settings, Legal, and View All Ads (Kindle with Ads devices only).
To navigate inside a tab, you can swipe the screen to go to the next or previous page. You can also tap on the scroll bar on the right of your screen by tapping the arrows, tapping the track, or dragging position marker to your desired location. A press and hold on the arrows will continue advancing to the next page until released and a press and hold on the track will continue advancing towards that position until released.
At the top of the Home screen, you'll see indicators that inform you about the status of your Kindle Scribe. To view these indicators within a book or document, tap the top of the screen to display the toolbars.
 Tap or swipe down to quickly access controls like Airplane Mode, Bluetooth, Sync my Kindle, and All Settings.
The Amazon Whispernet service wirelessly delivers content to your Kindle whenever and wherever you want it. Your Kindle can connect to Whispernet via its built-in Wi-Fi capability; some models also include free cellular network connectivity to Whispernet. The more bars on the Wi-Fi or cellular network status indicator that are filled, the stronger the signal.
 Your Kindle is connected to Whispernet using Wi-Fi. The more bars that are filled, the stronger the signal.
Your Kindle is in Airplane Mode. Wireless and Bluetooth connectivity is turned off.
 The Kindle battery indicator and percentage shows remaining battery life as it discharges. When your Kindle is charging, a lightning bolt appears on the battery icon. Note that a weak wireless signal can increase power consumption.
 The Bluetooth indicator appears when your Kindle is on and searching for audio devices in pairing mode or a Bluetooth audio device is paired with your Kindle.
 A Bluetooth audio device or VoiceView screen reader is connected or playing.
 This indicator appears in the top left corner of your Kindle screen when it is scanning or connecting to a network, busy downloading new content, syncing and checking for new items, searching for an item, opening a large PDF file, or loading a web page.
Quick Actions can be used to quickly make adjustments, or get into the Settings menu. Swipe down from the top of the screen, or tap the caret in the center of the screen to access screen light controls, Airplane Mode, Bluetooth, Sync My Kindle, and All Settings. The All Settings option will be replaced with VoiceView Settings when VoiceView is enabled.
When selected, your Kindle will be placed in Airplane Mode and you will have no wireless or Bluetooth connectivity. When selected, your Kindle will turn on Bluetooth (not available in all regions). Prevent your screen from rotating 180 degrees when moving your Kindle.
 Inverts the text, image, and page color on all screens. The display background will be black and text will be white.
 Tap to synchronize your Kindle with other supported devices you own and Kindle reading applications. Tap to access settings that will enable you to further customize your Kindle experience.
 icon to increase brightness, and tap the
  icon to decrease brightness.sign to use the maximum brightness setting. Press and hold the sign to use the minimum brightness setting.
 icon to use a higher light setting, and tap the
  icon to use a lower light setting.sign to select the maximum brightness setting. Press and hold the sign to choose the minimum brightness setting. button controls volume on your Kindle. You can also control volume from your Bluetooth device, if supported. To raise and lower the volume of your audiobook, tap , and
  .
.Your Kindle can store books, audiobooks, personal documents, newspapers, blogs, and magazines, which are referred to collectively as "content" throughout this guide. By default, all of your content in the Cloud and on your device displays in the Library tab. Items that have been downloaded to your Kindle display a check mark in the lower left corner of the cover image when in Grid view and on the right side of the screen when in List view. To view just the content downloaded to your Kindle, tap the filter menu in the top left and select Downloaded.
You can view content on your library screen using the default Grid view, which displays the periodical or book cover, by List view, which displays book information, or by Collections view, which displays your created collections. To change this preference, tap in the top right, then select Grid, List, or Collections view.
To view more information about a specific item and access a menu of applicable options, tap the overflow menu ( ) on an item’s cover when in Grid view (or to the right of the item's name if using List view). You can also view these options by pressing and holding on the item's name or cover. The available options may change depending on what you're currently doing with the device and available services and subscriptions. Actions may include Play Audible, Add to Goodreads Shelf, Return Kindle Unlimited Book (known as Return Abonnement Kindle Book in France), Add to Collection, Go To, Search This Book, Remove from Device, and Share. Note that About the Author is only available for books that support author profiles.
The Kindle and Audible Stores (Audible is only available in US, UK, and DE) offers a wide selection of Kindle books, Audible audiobooks, Kindle Singles, newspapers, magazines, and blogs. To access the store, tap the Store icon on the home screen. You will also find store options in some menus.
To navigate within the Kindle and Audible Stores, tap on any area of interest, then swipe left and right or up and down to move around pages and lists. You can search for a title, browse by category, check out the latest best sellers, see details about titles, read customer reviews or view recommendations personalized just for you. The Kindle Store also lets you download book samples.
When you're ready to make a purchase, the Kindle Store securely uses your Amazon 1-Click payment method. After you order, the Amazon Whispernet service delivers the item directly to your Kindle via your wireless connection. Books are downloaded to your Kindle immediately. Connect to Wi-Fi to download large file size books, such as Audible or Comics. The download progress will display below the book’s cover or title on the Home screen. A New banner on the book indicates when the book is ready to be opened. Newspapers, magazines, and blogs are sent to your device as soon as they're published—often even before they're available in print. If your Kindle is in Airplane Mode when a new issue of a periodical becomes available, the issue will be delivered automatically the next time you have a wireless connection.
Sync ensures that purchases and downloaded book samples within Kindle apps or other Kindle devices registered to your account are always available to you. This enables you to read or listen to a few pages using the Kindle application on your iPhone, iPad, or Android device and then pick up right where you left off when you return to your Kindle device. For more information, see Reading Kindle content on other devices.
Kindle Unlimited (known as Abonnement Kindle in France) is an optional monthly subscription that enables you to read as much as you want on any device, and choose from over 1,000,000 titles and thousands of audiobooks. You can freely explore new authors, books, and genres from mysteries and romance to sci-fi and more. To learn more, visit the Kindle Store.
To import personal documents to your Kindle, you have multiple options using Send to Kindle:
If you have enabled Personal Document Archiving, your personal documents will be backed up in your library and ready to download at any time when Add to Your Library is enabled. To learn more about Send to Kindle, go to www.amazon.com/sendtokindle.
Send to Kindle supports Microsoft Word (DOC, DOCX), PDF, HTML, TXT, RTF, JPEG, GIF, PNG, BMP, PRC, and EPUB files, and sends them to this Kindle to be used in a Kindle-friendly format, where you can add annotations, and bookmarks. This device also natively supports documents in PDF and TXT format. However, only personal documents converted to Kindle format and saved to your library will synchronize across devices, and store notes, highlights, bookmarks, and last page read when Sync is on.
By default, your content is sorted by Recent, meaning that new items and the content you're currently reading are at the top. To change the sort option, tap the  , located under the toolbar on the right side of the screen. Options include Most recent, Title, Author, and Publication date.
To filter your content, on your library screen tap . Multiple filtering options are available.
You can filter by read state:
Tap Read to view only your read items. Tap Unread to view only your unread items. Books you finish are automatically marked as read.
You can filter by content type:
If you have set up an Amazon Family and enabled sharing, two new filtering options will appear under All Items:
Tap Your Items to view only your items. Tap Shared Items to view only items that the other adult in your Amazon Family has shared.
If you have at least one filtering option selected you will see a toolbar appear listing all the active filtering options. Clicking on the X on the filter will clear that filtering option.
You can also filter items that you have stored in the Cloud. To view your Cloud content, deselect the Downloaded filter in the filter menu.
Cloud Collections enable you to organize the content on your Kindle Scribe into customized categories that are stored in the Cloud. Your collections are synced between other devices and reading apps that are registered to the same Amazon account and that support Cloud Collections. You can add as many items as you like to each collection, including books and personal documents. Items can also be added to more than one collection. Audible content cannot be added to collections; however you can add the Kindle book version. For information on devices and apps that support Cloud Collections, go to www.amazon.com/devicesupport.
To create a new collection:
You can add or remove items at a later time. Tap the overflow menu (the three dot icon) on the collection’s cover when in Grid view or Collections view, or tap on the right side of the screen when in List view, then tap Add/Remove Items. You can also view this option by pressing and holding on the collection's name or cover. Other options include Rename, Remove Collection from favorites, and Delete. To exit a collection, tap the Home or Back icon.
To filter the content in your library by collection, tap , then Collections.
Collections on your cloud account will always display in Collections view. You can modify how collections show in Grid and List view by opening Settings > Home and library > Library tab > Collections. Here you can select to show collections only in Collections view, show favorites in Library, or show All in Library. Depending on the selected setting, collections appear in your All Items, Books, Comics, Periodicals, and Docs views. To mark a collection as a favorite, tap the overflow menu (the three dot icon) on the collection's cover when in Grid or Collections view, or on the right side of the screen when in List view, then tap mark collection as favorite. You can also view this option by pressing and holding on the collection's cover (or name if using List view). Note that this setting is device-specific and will not be saved when you deregister your Kindle. When show only favorites is selected in the settings menu, you can hide collections from Grid or List view by tapping overflow menu (the three dot icon) on the collection’s cover, then tapping Remove collection from favorites. You can also view this option by pressing and holding on the collection's cover or title.
Tips:
Content that is purchased from the Kindle or Audible Store is securely stored and available in the Amazon Cloud. This includes copies of all your books and audiobooks, along with recent issues of newspapers and magazines. To download content to your Kindle, go to Your Library, tap All, then select the content that you want to download.
On your library page, tap on the in the top left of the screen, and select clear all to view all content associated with your account, including downloaded content and content that you have transferred to your device.
To view only content downloaded to your Kindle, tap in the top left of the Library screen. In the filter menu, deselect Downloaded.
The Manage Your Content and Devices page, accessible from www.amazon.com/devicesupport, offers a handy way to view and manage your Kindle content, settings, and account using a web browser.
Tips:
in the top left of your library screen, and deselect the Downloaded filter, then tap on the item(s) you want to download to your Kindle. During the download process, you can cancel a download by tapping on the item's title.in the top left of your library screen, and select the downloaded filter. You can also look for the check mark in the lower left corner of the cover image when in Grid view and on the right side of the screen when in List view.in the top left of your library screen, deselect the Downloaded filter, and download to your Kindle any content that you want to have available when offline.To view how much free space your Kindle has available for storing content:
.Transferring content from your old Kindle to your new one depends on the source of the content. Content purchased from the Kindle Store, such as books, periodicals, and magazines, is securely stored and available in the Amazon Cloud.
Your personal documents are saved in the Cloud if they were emailed to your Kindle and you have enabled Personal Document Archiving (this feature may not be available in all languages). Personal content that was transferred directly to your previous Kindle, but was not emailed to it, will need to be transferred manually.
To download content stored in the Cloud to your new Kindle:
Your Library in the top left of the Home screen.To transfer personal content that was stored on your Kindle, but not emailed to it:
To export annotations, documents and notebooks:
To export annotations from within a book:
 ) in the navigation toolbar.
To export from within marked-up documents:
) in the navigation toolbarTo export from within standalone notebooks:
) in the navigation toolbar. Searchable PDF is available through the Convert to text share options for standalone notebooks. This exported PDF of your notebook has a hidden text layer associated with your handwritten note, thereby making your handwriting searchable.
To free up space on your Kindle, you can (1) manually remove individual items, (2) permanently delete individual items, (3) remove items by content type, or (4) quickly archive them.
(1) To remove individual items, tap the menu icon on the item's cover when in Grid view or on the right side of the screen when in List view, then tap Remove download. You can also view this option by pressing and holding on a collection's name or cover. Your content will remain securely stored in the Cloud for download at a later time. Your personal documents are only saved in the Cloud if they were emailed to your Kindle and you have enabled Personal Document Archiving. Note that files transferred to your Kindle using the USB cable will be permanently deleted when you remove them, because they are not stored in the Cloud.
(2) To permanently delete items from your cloud account and all your devices, tap the menu icon on the item’s cover and select permanently delete. Note: Using permanently delete will remove a title from all of your devices and will need to be repurchased if you wish to read it again.
To manually select items by content type or quickly archive items, open the Quick Actions menu, then tap All Settings . On the Settings page, tap Settings > Device options > Storage management. Settings include:
(3) Manual Removal: Select items to remove from your Kindle based on content type, including Books, Audiobooks, Periodicals, Docs, Samples, and Others. The items downloaded from the Cloud will still be accessible by tapping All on your library page. Items that you manually transferred from your computer to your Kindle will be permanently deleted. Even after permanently deleting, audiobook content can still be found by filtering in your Library and selecting "Audible".
(4) Quick Archive: This option allows you to free up storage space on your Kindle by removing items downloaded that have not been opened recently. The items downloaded from the Cloud will still be accessible by tapping All on your library page. Items that you manually transferred from your computer to your Kindle will be permanently deleted.
Your Kindle uses Amazon Whispernet to deliver books, periodicals, personal documents, Kindle Singles, and blogs to your Kindle without the need for a computer.
For Windows computers, when you first connect the Kindle to a computer's USB port, it will appear as an external storage drive or volume on the computer's desktop. The Kindle volume contains a folder called "documents." You can add Kindle-compatible files to this folder, and you can copy, move, or delete the files that are already there. If you have a large collection, it is recommended that you create multiple subfolders inside the documents folder and put a maximum of 2,000 files in each subfolder. See the Kindle Support website (www.amazon.com/devicesupport) for more information on supported file types.
When reading, tap the top of the screen to display the In-book, and Reading Navigation toolbar. Toolbar icons vary by book, but may include:
 : Tap to choose from different reading personalization settings to customize your page display. These settings make it easy to customize your book for your reading preference and situations - such as font, line spacing and more into a simple choice. For example, if you like to use a larger font and wider line spacing while reading on the treadmill and a smaller font when reading in bed, you can now quickly switch between your preferred settings. You can also create and save your own custom reading personalization setting. For more information, see Customizing your text display.
 Go To: The Contents tab displays the book’s contents, including Beginning and chapter titles. Use the Page or Location option to further navigate your book. The options displayed will vary depending on the content you're reading.
 Annotation Notebook: Tap the Annotation Notebook icon to access your annotations for that book. Search: Search for content by tapping the magnifying glass. To search within a book or document when reading, tap the top of the screen to bring up the toolbars, then tap the Search icon and enter the text you want to search for. The results will include matches from the book or document, as well as text notes and highlights that you have made.Overflow: Menu options here may include About This Book, Show/Hide Writing Toolbar, X-Ray, Vocabulary Builder, Sync to Furthest Page Read, and Share. Note that About the Author is only available for books that support an author profile.
 Switch to Listening: If you are reading a Kindle book with Audible and tap to open the toolbar, a headphone icon will appear on the bottom right of the screen. Tap the icon to switch to the Audible Player to listen to the audiobook version.
In periodicals, the toolbar includes:
Periodical toolbar

Tapping almost anywhere in the display area will take you to the next page; the area is large enough to be tapped whether you hold the device with your left or right hand. Tap the left side of the screen to go to the previous page. The EasyReach tap zones differ depending on whether your Kindle is in portrait or landscape mode. When reading, you can change the screen orientation by tapping the top of the screen to display the toolbars, then tapping the Aa menu. On the Layout tab select the desired orientation.
Portrait Mode

Landscape Mode

If you prefer, you can change pages by swiping the screen with your finger. To go to the next page, swipe your finger from the right to the left across the screen. To go to the previous page, swipe your finger from the left to the right across the screen.
There are multiple ways to quickly navigate through a book:
Page Flip lets you preview other pages in a book without leaving your current page or losing your place. To open Page Flip, tap the top of the screen or swipe up from the bottom of the screen.
Once in Page Flip, tap or swipe the page thumbnails to flip through your book page by page. Tap on the progress bar, or press, hold, and drag the circle forward or back, to preview a new page or location in the book.
Tips:
You can also navigate through your book using the Go To item on the reading toolbar, accessible by tapping the top of the screen. The Contents tab displays the book’s contents, including Beginning, End, and Chapters. Use the Page or Location option to further navigate to a specific page or location in your book. The options displayed will vary depending on the content you're reading.
Once you have used the navigation options to go through your book, you can also view your previous reading history. To access this history, swipe up from the bottom of the screen to display Page Flip and tap the arrows next to the Location or Page numbers at the bottom of the screen. Note that this history is cleared when you exit the book.
Your Kindle provides a quick way to adjust the appearance of books and periodicals. To access those settings when reading, tap the top of the screen to bring up the toolbars, then tap the icon. The menu offers different reading personalization settings to customize your book display. These settings make it easy to customize your book for your reading preference and situations - such as font, boldness, line spacing and more into a simple choice. You can select the "Font & Page Settings" option from the dropdown menu to further customize your book's display.
Tap the Font tab to:
Tap the Layout tab to:
Tap the More tab to:

Tap the Themes tab to:
Page Display settings are device specific. Any changes you make to these settings will apply to all books you read on your Kindle. Note that your Kindle also applies kerning, optimizes layout for large fonts, and automatically optimizes line spacing for faster, easier reading across all fonts.
To refresh the page with every page turn, open the Quick Actions menu, then tap All Settings . On the Settings page, tap Reading Options and use the Page Refresh setting to set your preference. To refresh settings for manga, comics, and picture books, tap the overflow menu (the three dot icon), then tap the Page Refresh On/Off setting
You can install your favorite fonts on your Kindle and choose one of them from the Page Display (Aa), Font & Page Settings menu, to read your eBooks. Connect the Kindle to a computer and refer to the "Read Me" file in the "fonts" folder for more information.
Your Kindle provides a quick way to adjust the display of PDFs you imported via Send to Kindle and Write-on Kindle books. To access this settings when reading, tap the top of the screen to bring up the toolbars, then tap the Aa icon.
Your Kindle gives you access to features that are not available with printed materials, such as instantly viewing word definitions, easy access to footnotes, and end-of-book actions. Just as with a traditional book, you can also highlight favorite passages, add notes, and create bookmarks. Smart Lookup enables you to select a word or multiple words and view a number of options, such as Highlight, Note, Share, and Search. A series of cards display available information, and may include X-Ray, Wikipedia, dictionary definitions, and translation options. To switch between cards, simply swipe from side to side.
Before starting a new book, you can get valuable information and perform actions to improve your reading experience. Options vary by book, but may include:
To enable or disable this feature, open a book, tap the top of the screen to bring up the toolbars, then tap the Page Display (Aa) icon and click on the More Tab.
You can add notes and highlights by pressing and holding on a word, then dragging your finger or Pen across the screen to select all the text you want to highlight.
Tips:
To add a note, highlight a single word, multiple words, or a sentence, then tap Note. Additional options include highlighting the selected text, sharing with friends on Goodreads, and searching the book, all text, or the Kindle Store. Tap the overflow menu (the three dot icon) on the options bar to view more options, including opening the dictionary and reporting an error with the content. You can also swipe through the different cards to view the X-Ray topic (if available), dictionary definition, Wikipedia entry, and an option to translate the selected word.
Notes will appear as sticky note icons ( ) within the text. To view a note the next time you visit that page, simply tap on the icon. You can view all of your notes and highlights by tapping the notebook icon in the main toolbar. The notes and highlights closest to your current reading location will display first in the list.
If several other Kindle users have highlighted a particular passage in the book you are reading, you will see that passage underlined. To turn off these highlights, open the Aa menu > More > Popular Highlights.
Notes and highlights are added to a file in your library called Your Clippings. When Sync is on, these items are stored in the Amazon Cloud for you so they won't be lost. To manage your Sync settings, Open the Quick Actions menu, then tap All Settings . On the Settings page, tap Device Options > Sync.
To add a bookmark when listening to an Audible book, tap the Add Bookmark button on the toolbar at the top of the Audible Player. These are audio-only bookmarks. To associate a note with an audiobook bookmark, tap the Add Note button.
To quickly preview a footnote, endnote, or chapter note without losing your place in the book, tap the note. These notes are displayed in a pop-up panel, either at the bottom of the page when the note will fit in the bottom-third of the page, or full screen if the note will not fit in the bottom-third of the page. To go to the selected location, scroll to the bottom of the preview pane and tap the "Go to" option. To return to your original location, tap the preview pane. Note that not all books support this feature.
You can learn more about a book mentioned within the book you are reading through this feature. Click on the name of a book that is underlined to learn more about the mentioned book. Note that not all books support this feature.
The Before you go... dialog box appears when you reach the end of a book, or after you swipe past the final page of a book. It enables you to rate the book using stars, update your reading status on Goodreads, find more about the author, and purchase the next book if in a series.
You can synchronize your Kindle books with other supported devices you own and Kindle reading applications. When Sync is on, Kindle synchronizes your last page read, notes, highlights, and bookmarks. For example, you can read a few pages using the Kindle application on your iPhone, iPad, or Android device and then pick up right where you left off when you return to your Kindle. For a complete list of supported devices and Device Synchronization settings, go to www.amazon.com/devicesupport.
When reading comic books, use a pinching motion to zoom in and out. You can navigate through the panels by swiping your finger across the screen or tapping the sides of the screen.
To enter Kindle Panel View when reading a comic book, double tap the screen. For manga books, you must first enable Kindle Panel View by tapping the Menu item and then tapping the Virtual Panel setting to On. You can now enter Kindle Panel View by double tapping the screen. To access page refresh settings, tap the Menu item, then tap on the Page Refresh On/Off setting.
An improved manga experience with more advanced page turn controls is now available on thousands of books. Press and hold for fast, continuous page turns. Drag left and right to adjust speed and direction. More books that support this new experience are being added every day.
Your Kindle automatically groups comics content by series to help keep your library organized. Each series will be represented in your library by the cover of the book you most recently interacted with, and will have an icon in the lower left corner indicating how many books in that series you own or have downloaded. To access the book in a series grouping, tap on the cover image to see a list of the books. This series grouping also provides new sorting options, including series reading order (ascending/descending) and release date (ascending/descending). To turn this feature off, open the Quick Actions menu, then tap All Settings . On the Settings page, tap Settings > Device options > Library tab > Group series. If you see a book that is grouped incorrectly, simply long press the cover of the book and select Submit series feedback to let us know what to fix.
Some Kindle children's books feature Kindle Text Pop-Up for reading text over images. You can navigate between Text Pop-Up sections by swiping your finger across the screen or tapping the sides of the screen. Children's books that support this feature will automatically open in this view. To exit Text Pop-Up and return to normal reading, double tap the screen.
You can increase the size of an image in a Kindle book for easier viewing. Simply press and hold your finger on the image and then release to display a magnifying-glass icon. A series of options will also display, including Highlight, Note, Share, and Search. Tap the overflow menu (the three dot icon) on the options bar to view more options, such as Report Content Error. To return the image to normal size, tap on the image.
Some Kindle books enable you to zoom in further by placing two fingers close together on the center of the screen and moving them apart. To zoom out, place two fingers slightly apart on the screen and pinch them together. While zoomed, drag your finger across the image to move to the area of interest. To return to reading, tap the X in the top right corner of the image.
Enhanced viewing is available for tables that are interactive, enabling you to both pan and zoom. Tap on the table to display the panning and magnifying-glass icons.
To pan, tap the panning icon and then drag your finger across the screen in the direction you want to pan. You can select text in the table by pressing and holding on the text, then dragging your finger across the screen to select it. To edit the range of your highlight after you have selected it, press and hold on the handle at the start or end of the highlight and drag your finger across the screen to the desired location. A series of options also display, including Highlight, Note, Share, and Search. Tap the overflow menu (the three dot icon) on the options bar to view more options, such as Wikipedia, Translation, and Report Content Error. You can also swipe through the cards to view the X-Ray topic (if available), dictionary definition, Wikipedia entry, and if applicable an option to translate the selected word. To exit panning mode, tap the table.
To zoom, tap the magnifying-glass icon. To zoom in further, place two fingers close together on the center of the screen and move them apart. To zoom out, place two fingers slightly apart on the screen and pinch them together. While zoomed, drag your finger across the table to move to the area of interest. To return to reading, tap the X in the top right corner of the table.
Newspapers and magazines are stored in folders by periodical name. When you open the folder, you can open the filter menu and deselect Downloaded to view all of the periodicals you have stored in the Cloud or select Downloaded to view just the issues downloaded to your Kindle. Audible Periodicals are not stored in folders, and will appear in your library as single titles.
Issues that are more than eight issues old will be automatically deleted from your device to free up space for new content. Newspapers that are more than 14 issues old, and magazines that are more than 40 issues old, will be automatically deleted from the Cloud. "Expiring" next to an issue indicates that it will be deleted soon. Press and hold on a periodical folder to view the following options: Download Latest Issue and Remove All Back Issues. Note that Audible periodicals do not expire, and will remain on your device and in the Cloud.
You can view more options when you tap the overflow menu (the three dot icon) located on the periodical's cover when in Grid view or on the right side of the screen when in List view. Options include Add to Home, Add to Collection, Go To First Page, Go To Sections & Articles, Search This Issue, Keep This Issue, View Notes & Marks, View Back Issues, and Delete This Issue. You can also view these options by pressing and holding on the name or cover of the issue.
There are two ways to keep a copy of an issue on your device:
and select Downloaded, then tap the overflow menu (the three dot icon) located on the issue's cover when in Grid view or on the right side of the screen when in List view. Select Keep This Issue from the options. You can also view this option by pressing and holding on the name or cover of the issue.You can access all of your back issues, regardless of age, on the Manage Your Content and Devices page, accessible from www.amazon.com/devicesupport.

In most books, personal documents, and notebooks (see next sections) the Pen can be used to draw and write notes. Different tools will be available depending on the book, document, or notebook. The toolbar contains the tools available in that content type.
 to copy the strokes, 4) tap on
  to cut the strokes, or 5) tap on
  to delete the strokes. If you copy or cut your strokes, they will be saved to the Clipboard.
To hide the writing toolbar, tap on the top of the screen to display the top navigation bar, tap on the icon, and select “Hide Toolbar”. This will hide the toolbar across all books and documents. To show the toolbar again, go to the same menu and select “Show Toolbar”.
Your Kindle Scribe allows you to take notes in books, and create notebooks for you to jot down your thoughts, take notes, or create to-do lists.
Create a notebook by selecting () next to the Search Toolbar in the upper right corner of the screen.
Alternatively, in the Notebooks tab, tap the + icon in the upper right corner of the screen to create a notebook or create a folder.
In notebooks, you will be able to create notes using the writing toolbar with writing tools such as pen, highlighter, eraser, and undo/redo. You can use your finger to swipe to turn pages while you have any writing tool selected. If you select the Pointer tool, you can use the Pen to swipe or tap like a finger to navigate on screen.
Rename, change the cover image, or change your notebook’s template within Notebook Settings. To access the Notebook Settings menu, inside a notebook, tap the top of the screen to open the main toolbar, then tap the Notebook Settings icon ( ).
).
You can also rename a notebook by tapping the  icon in a notebook. You can also set the language for handwriting recognition in Notebook Settings. This configuration enables searchable notes and supports AI tools for refining and summarizing notebook content. Using this feature, you can write in different languages on your device and make all content searchable.
Templates make it easier to write in certain formats, or to use notebooks for a specific purpose. Select a template when creating a new notebook, or change an existing notebook’s template by going into Notebook Settings. Templates can be applied to selected or all pages in a notebook.
You can preview multiple pages of your notebook at a time in a tiled layout in a notebook overview. Open the main toolbar and tap on the  icon. Once in the overview, you can preview other pages of your notebook by swiping up or down in the center of the screen or by using the scroll bar. The selected page will have a thick border. Tap on a different page to select it. You can do the following with a selected page:
 Add” in the top toolbar. Or, add a page after the last notebook page by tapping the large + page-like icon. Delete” in the top toolbar.
 Move”, and then tapping between any two pages to place it. Share”, and then choosing to share the selected page or the entire notebook.
To exit the overview and go back to the page you were previously on, press the back arrow in the top left of the screen. To navigate to a specific page, first tap to select it, and then tap again to open it.
While in Notebook Overview, you can also tap on “ Select” in the top toolbar or long-press on any page to select multiple notebook pages. Once in this “multi-select” view, you can select multiple pages and each selected page will have a checkmark in their top left corner.
To exit multi-select view, tap the X in the top right corner to go back to Notebook Overview.
To quickly navigate to a specific page in your notebook, open the main toolbar, tap on the overflow menu ( ), and select Go to page.
Kindle Scribe now supports AI Notebook Tools - 'Summarize' to extract key takeaways (up to 15 pages) and 'Refine writing' to convert your handwritten notes into polished, script-like font (up to 10 pages). Just tap on the AI icon  to access the tools. You can summarize or refine the current page, entire notebook, or select specific pages using Bird's Eye View (BEV). You can customize font style, size and spacing selections of the output. You can also customize the length and tone of summaries and save your customization options for quick access. Results are inserted into your notebook using a blank page template for a clean, organized presentation. Refine writing works best for narrative-style notes, to-do lists, or nested lists, but may not be as effective for non-linear layouts like calendars or planners. Both tools may need time to sync new notebooks. For a faster experience, tap 'Sync' to manually sync your notes before using AI tools. AI Notebook Tools are supported in English, French, and German languages in US, Canada, Germany, Australia, and New Zealand.
In Kindle books, the writing toolbar will have all writing tools available. The stylus will default to the Pen tool.
Select the Highlighter tool to use your stylus to draw highlighter strokes on the page. Those strokes will snap to text. You can highlight each line of text at a time, or draw a diagonal line down multiple lines to more quickly highlight. Select the Pen tool to use your stylus to draw underline or circle strokes on the page. Those strokes will snap to text. You can underline each line of text at a time, or circle single and multiple lines of text. You can tap on any annotation to display a small toolbar where you can delete the annotation, change it between annotation types, create a note associated with it, and more.
You can create handwritten notes in the book in two ways: 1) Select the Pen tool and begin writing anywhere on the screen. A translucent background will appear with Checkmark and X icons. Once you are finished with your note, tap the Checkmark and your note will be inserted in line with the book text. Or, tap the X icon to cancel the note. 2) Select the Canvas tool in the writing toolbar, and tap on the screen to insert your note. You can also tap and hold on the screen and a positioning line will appear which you can drag up and down. Once you release your stylus from the screen, a Canvas will be inserted. You can tap on any inserted Canvas on the page to increase or decrease the size of the canvas, or delete it. To move any inserted Canvas, tap and hold with your finger, then drag the canvas around on the page.
When you want to write in the margin, you can tap on the Side Panel icon near the top of the left or right margin to open it. The Side Panel icon and feature opens on the opposite side of the writing toolbar. You can write notes in the side panel by writing directly in the space and the note will anchor to book text near your note; or you can select the Sticky Note tool in the writing toolbar and tap on book text where you want to anchor your note; or you can tap on any highlight, underline, or outline and select the Note action in the displayed menu. Choose between different width views of the side panel, as well as whether you want it to be docked and next to the book content, or overlaid on top of the book content. Your side panel margin notes also appear as sticky notes if the side panel is closed.
When you want to create a sticky note, you can either tap on the “Note” option in the annotation menu which appears when you tap on a highlight, underline, or outline annotation, or tap on the sticky note tool in the writing toolbar, then tap on the page to place your note where you want it. A dialog box will appear that will allow you to create either a handwritten or a text note (or both). If you choose to create a text note, you can type it using the onscreen keyboard. If either tab has any content, an asterisk will appear. You can also move the dialog box to the top or bottom of the screen by tapping on the overflow menu (the three dot icon) in the sticky note. To move any sticky note, tap and hold the icon with your finger, then drag it around on the page.
After you finish your sticky note, tap on the X to close and save it. A note icon ()will be displayed marking where you saved your sticky note. Tap on the icon to reopen the note and make any edits. You can also tap on the overflow menu (the three dot icon) to delete or move the note. Your sticky notes also appear as side panel margin notes if the side panel is open.
You can directly mark up images in books with free-form strokes.
To view all of your annotations for a book, you can tap on the top of the screen to trigger the main toolbar and tap on the notebook icon. In this consolidated view, you can see all of your highlights, underlines, outlines, handwritten notes, text notes, and notes in images. If you tap on any item, you will be taken to that note’s location in your book. You can also export your annotations via email. Tap the back arrow on the top left to go back to reading your book.
In PDFs that you import onto your device using Send to Kindle (www.amazon.com/sendtokindle, support available in the US, UK, DE, FR, IT, ES, JP, CA and AU), you will be able to write notes directly on the page. You will have a writing toolbar with writing tools such as pen, highlighter, eraser, and undo/redo. You can use your finger to swipe to turn pages while you have any writing tool selected. If you select the Pointer tool, you can use the Pen to swipe or tap like a finger to turn pages or navigate on screen.
You can write directly on the page in PDF documents imported through Send to Kindle. Kindle Scribe doesn't currently support writing directly on the page in PDF documents loaded via USB-C or previously sent to your library before 11/11/2022.
To view all of your notes for a document, you can tap on the top of the screen to trigger the navigation bar and tap on the notebook icon. In this consolidated view, you can see all document pages with any markups If you tap on any page, you will be taken to that page of your document. You can also export your annotations via email. Tap the back arrow on the top left to go back to reading your document.
Your Kindle lets you shop for, purchase, and listen to Audible books. To purchase audio content directly from your device, go to the Audible Store or purchase the audiobook and Kindle book versions as a pair from the Kindle Store. To access the Kindle and Audible Stores, tap the top of the screen to display the toolbars, then tap the Store icon. You will also find store options in some menus.
If you are not an Audible member, you can sign up for membership from the Audible storefront or from the detail page of any Audible book. Note that Audible is not available in all countries, including China.
To listen to Audible books on your Kindle, you must first pair a Bluetooth audio device, such as headphones, speakers, or earbuds. There are two ways you can pair a Bluetooth audio device.
Pairing a Bluetooth device when opening an audiobook:
Pairing a Bluetooth device via Settings:
. On the Settings page, tap Wi-Fi & Bluetooth, then Bluetooth devices.If you are having trouble pairing your BT device, ensure it is:
If the problem persists, common troubleshooting steps include:
Note: This Kindle device supports A2DP and AVRCP profiles.

The slider at the top of the Audible Player allows you to navigate to any portion of the audiobook that has been downloaded. The time left in a given chapter displays above the slider, and the current chapter displays below the slider.
 Rewind button: Tap to rewind thirty seconds in your audiobook.
 Play/Pause button: Tap to play and pause your audiobook directly from your Kindle. You can also control playback from your Bluetooth device, if supported.
 Fast Forward button: Tap to fast forward thirty seconds in your audiobook.
Speed: Displays the current listening speed and allows you to select a new speed.
Chapters: Tap to select and listen to any chapter in the book. Playback will start from the new chapter after the chapter has been selected. You can also see the duration of each chapter from this dialog.
Add Bookmarks: Tap to add a bookmark. For more information, see Audiobook bookmarks.
Bluetooth Connected: The Audible Player will show you if a Bluetooth device is connected and the connected device's name. You can also tap here to connect to a previously paired Bluetooth device or pair a different Bluetooth device.
 Switch to ebook: If you own both the audiobook and Kindle book, this option displays. Use it to switch back to the reading experience and pick up reading your book from the same place you were listening.
For audiobooks, tap the Add Bookmark button at the bottom of the Audible Player. This will add a bookmark at the current location in your audiobook. These are audio-only bookmarks. To associate a note with an audiobook bookmark, tap the Add Note button. Tap the Bookmark icon  to view all your Audiobook bookmarks and notes.
Tips:
associated with the bookmark and select Edit Bookmark. associated with the bookmark and select Delete Bookmark.If you own both the audiobook and the Kindle book, but do not have the audiobook on your device, you can download the audiobook directly from the Audible Player if you are connected to Wi-Fi. If you are in the middle of reading the Kindle book version, your Audible book will be ready to play once the download reaches your current reading location. If you have not previously read or listened to the book, your audiobook will be ready to play after 5% of the book has been downloaded.
You can also download your Audible book via the overflow menu (the three dot icon). On the Home screen, tap Library in the top left of the screen. On your library page, tap the overflow menu (the three dot icon) on the book cover when in Grid view or the overflow menu (the three dot icon) to the right of the item when in List view, then select Download Audible book.
To download an Audible book without a companion Kindle book, on the Home screen, tap Library. Tap the book cover to start the download. Your audiobook will be ready to play after 5% of the book has been downloaded.
To cancel a download, on the Home screen, tap Library. Tap the overflow menu (the three dot icon) , then select Cancel download. You can also cancel it from the Audible Player by tapping the Cancel icon on the cover of the book.
If you own the audiobook and the companion Kindle book, they will appear as one item in your library and a pair of headphones will display below the book author name when in List view, and on the top right of the cover when in Grid view. When you own both items, deleting the Kindle book will also delete the audiobook.
If you own only the Audible book, the word "Audible" will display below the book author name when in List view, and an Audible banner will appear at the bottom of the cover when in Grid view.
You can also filter to only see Audible books. To learn more about filtering, see Filtering.
To download an Audible book with a companion Kindle book, open the Kindle book, tap the top of the screen in the book to bring up the toolbars, then tap on the headphone icon to switch to the Audible player. Once in the Audible player, tap the Download button on the Audible cover.
The X-Ray feature lets you explore the "Bones of the Book" with a single tap, enabling you to see all of the passages in a book that mention specific ideas, fictional characters, historical figures, places, topics, and terms. X-Ray also extracts notable clips, people, terms, and images from a book and presents them in a stack of cards organized on a timeline so you can quickly skim through the clips and view all of the images in one place.
When you're reading a book, press and hold on a character’s name or a place mentioned in the book to view the corresponding X-Ray topic. Tap Open X-ray to view the full X-Ray topic. You can also tap the top of the screen to display the secondary reading toolbar, then tap the overflow menu (the three dot icon) . If X-Ray is not available for a book, the option will not appear. X-Ray will scan your entire book and a dialog box will display. Tap the timeline to view notable clips in other parts of the book. Additional excerpts beyond your furthest page read are hidden until you tap to show all mentions. Note that X-Ray is not available for all Kindle books or in all countries. Look for X-Ray Enabled in the Kindle Store description of the book to find out if a book has X-Ray.
If you are a series reader in the US, you can now enjoy an enhanced Kindle reading experience that offers short book recaps for Kindle books in series you’ve purchased or borrowed. Recaps will help you quickly refresh your memory about major themes and events in a book prior to starting the next book in the series.
You can access recaps for thousands of best-selling English language Kindle books in series. To determine whether a series has recaps enabled, look for the ‘View recaps’ button in the series page in your Kindle Library or ‘View recaps’ item within the series grouping overflow menu (the three dot icon). .png) If recap is not available for a book, this option will not appear.
If recap is not available for a book, this option will not appear.
Your Kindle includes one or more dictionaries for each supported language. After you have successfully registered your Kindle, all of your dictionaries will be available in the Dictionaries collection either on the Home screen or in the Cloud. Available dictionaries will differ depending on the language you select.
To change your default dictionary:
.To look up the definition of a word while reading, press and hold to select the word. A card displays with the definition of the word. You can change your dictionary by tapping on the name of the current dictionary. An option to select a new dictionary will display.
The Smart Lookup feature integrates a full dictionary with X-Ray, Wikipedia, Word Wise, and Bing Translate so you can access definitions, characters, settings, and more without leaving your page. To switch between cards, simply swipe from side to side or select Word Wise or Wikipedia from the dropdown menu. If the selected word is also an X-Ray topic, Smart Lookup will display the X-Ray tab. For more information, see X-Ray.
Word Wise, available on many popular English-language titles, makes it easier for readers learning English and kids reading their first chapter books to understand challenging books more quickly. When Word Wise is on for an enabled title, short and simple definitions automatically display above difficult words so you can keep reading without the need to look words up. To learn more or see the various meanings the same word can have in a different context, tap the word to display a card with definitions, synonyms, and more. Tap Word Wise in the bottom right corner of the screen and use the slider to adjust the number of hints you see. To turn on Word Wise, open the Aa menu, navigate to the "More" tab and enable Word Wise.
You may also see multiple-choice hints for words with more than one possible meaning when we’re not quite sure which is the right one. For those words, we show you our best guess above the word. When you tap Other Meanings, all possible meanings of the word display and you can let us know which one is most helpful in the given sentence. To turn off multiple-choice hints, open the Aa menu, navigate to the "More" tab and select Word Wise, then disable Show Multiple-Choice Hints.
Words you look up in the dictionary are automatically added to Vocabulary Builder. To view your word list and quiz yourself with flashcards, select Vocabulary Builder from the menu (the three dot icon)while reading a book.
To view your word list, tap Words in the top left of the screen. Tap a specific word to view its definition and a usage example. To view your words by book, tap the Books link.
When you tap Flashcards at the bottom of the screen, Vocabulary Builder selects a set of words from the current list and displays them as flashcards. To view a word’s definition, tap See Definition in the top left corner of the flashcard. Tap Exit Flashcards to return to the Vocabulary Builder feature. Tap the Learning link on the Vocabulary Builder main screen to see how many words you are currently learning and how many you have already mastered.
To turn Vocabulary Builder off, in All Settings, tap Books and Notebook Options, then from Vocabulary Builder tap the On/Off toggle to Off mode. Note that words you look up are not added to Vocabulary Builder when it is off.
Your Kindle includes a Web Browser that enables you to surf the web and view most Amazon web pages. The Web Browser supports JavaScript, SSL, and cookies, but does not support media plug-ins. You must have a Wi-Fi connection to access most websites.
To launch the Web Browser, on the Home screen tap More in the bottom bar, then select Web Browser. The first time you access this page, you will find a list of default bookmarks for commonly used sites. You can access these bookmarks later, by selecting Bookmarks from the web browser menu.
To enter a URL, tap the search field at the top of the screen. Use the onscreen keyboard to enter the web address. A ".com" key is added to the keyboard when you are entering URLs. The address field will retain the last URL you entered.
Tips:
From within Web Browser, tap the overflow menu (the three dot icon) to view other options, including Article Mode, Bookmarks, Bookmark this Page, History, and Browser Settings. Browser Settings include Clear History, Clear Cookies, Disable JavaScript, and Disable Images. Note that web pages will load faster if you disable JavaScript.
When reading an article, there is also an option to switch to Article Mode which changes the page layout and displays the article in a simple text column eliminating surrounding images and ads.
To bookmark a web page, tap the overflow menu (the three dot icon) and select Bookmark this Page. To delete a bookmark, tap the overflow menu (the three dot icon) and select Bookmarks. Tap the Remove button at the bottom of the page, tap to select the checkbox next to the URL(s) you want to remove, then tap the Remove button.
Some websites may have books or documents that you want to download and read on your Kindle. You will be asked to confirm if you want to download these items to your Kindle Home screen. Supported file types for download include Kindle content (.AZW, .AZW1, .AZW3, and .KFX), unprotected Mobipocket books (.MOBI, .PRC), and text files (.TXT).
You can now set up an Amazon Family with another adult in your family, enabling both of you to jointly manage up to four Amazon Kids (formerly known as Amazon FreeTime and Amazon Fire for Kids in the UK) child profiles. Amazon Family Library Sharing lets you share books with each other across Amazon devices and Kindle apps. This will not impact your annotations, most recent page read, and furthest page read in books. Please read this section prior to creating an Amazon Family to familiarize yourself with the process and terms.
To add a second adult to your Amazon Family:
. On the Settings page, tap Your account, then tap Amazon Family.To add a child to your Amazon Family:
To share all of your purchased books or just individual books with your Amazon Family members, open the Quick Actions menu, then tap All Settings. On the All Settings page, tap Your account, then tap Amazon Family. Tap Amazon Family Sharing and select the Amazon Family member you like to manage sharing.
To edit attributes associated with adults in your Amazon Family, open the Quick Actions menu, then tap All Settings . On the Settings page, tap Amazon Family Library. Tap the name of the individual to:
Note that leaving an Amazon Family will result in both adults not being allowed to join or start an Amazon Family for 180 days, and the Family cannot have another adult added for 180 days. Your digital content and payment methods will no longer be shared with the other adult in the Amazon Family. You will also no longer be able to administer child accounts that are part of the Amazon Family. You can manage individual books for sharing on the Manage Your Content and Devices page, accessible from www.amazon.com/devicesupport.
Connect to the world's largest community of readers with Goodreads on Kindle, where you can see community book ratings and keep track of what you've read and want to read. Tap Goodreads Shelves in the More section in home to get started. You will be prompted to sign in to Goodreads or create a new account if you did not do so when setting up your Kindle.
When you log in with an existing Goodreads account, your account data will sync with your Kindle, including your Want to Read, Currently Reading, and Read shelves.
Keep track of what you're reading by adding books to your Goodreads shelves. You can rate books you've read from one to five stars. Rating a book adds it to your Read shelf. You can also tap Add to Goodreads to shelve the book as Currently Reading or Want to Read or Read. Shelved and rated books are publicly visible on your Goodreads profile. You can always remove a shelved book later by tapping Remove from Shelf.
You can also add a book to your Goodreads shelves from the Home screen of your Kindle. Tap the overflow menu (the three dot icon) on the item’s cover when in Grid view or on the right side of the screen when in List view, then tap Add to Goodreads Shelf. You can also view this option by pressing and holding on the book's name or cover. Then from the Select Goodreads Shelf pane, you can shelve the book as Read, Currently Reading, or Want to Read.
Tips:
You must have a Wi-Fi connection to use most Goodreads on Kindle features. Note that Goodreads is not available in all countries.
The sharing feature enables you to share books, Kindle highlights, and comments with friends on Goodreads. Using Goodreads on Kindle, you can shelve, rate books, and share your Kindle highlights to Goodreads. To link your Kindle and enable sharing, Open the Quick Actions menu, then tap All Settings . On the Settings page tap Your Account.
To access the sharing feature from within a book, tap on the overflow menu (the three dot icon), then tap Share. To share an excerpt from a book, simply press, hold, and drag your finger across the screen to select the desired text, then tap Share. Select the sharing option you want to use from the list.
Your Kindle includes Time to Read, a feature that helps you know how long it will take to finish a chapter or book and displays that information on the Reading Navigation toolbar located at the bottom of the screen. To customize this feature, tap the top of the screen to bring up the toolbars, then tap the Display Settings icon (Aa). A dialog box displays with four tabs: Font, Layout, More, and Themes. Tap the More tab to select Reading Progress and select your preferred tracking options.:
Note that not all Kindle books include page numbers. To hide reading progress, select the None option.
Because Kindle books can be read on devices with different screen sizes, locations identify specific places in a book, just like a page number would for a print book. Location numbers allow you to direct a friend to the exact same place in a Kindle book you are reading. Many Kindle books also contain page numbers that correspond to the real page numbers in an actual print book.
The Time to Read feature uses a unique algorithm to estimate the amount of time it will take you to complete the chapter or book based on your past and current reading speed. Your specific reading speed is stored only on your Kindle; it is not stored on Amazon servers.
When you tap the top of the screen, the chapter name (if available) also displays on the Reading Navigation toolbar.

On your library page, dots below the book title indicate how long the book is, with bold dots showing how far you have read.
With the Assistive Reader, you can listen to your books with Text-to-Speech and read along with synchronized real-time underlining.
To use Assistive Reader on your Kindle, you must first pair a Bluetooth audio device, such as headphones, speakers, or earbuds.
Assistive Reader uses your device's OS-level Text-to-Speech engines to read aloud the text of the book.
Assistive Reader automatically pauses when you’re no longer reading, such as when you open the navigation menu or make an annotation (highlights or notes).
Assistive Reader works with any Kindle book with Enhanced Typesetting. To learn if a book supports Enhanced Typesetting, go to the Kindle eBook Store and look for "Enhanced Typesetting: Enabled" in the features list.
The Assistive Reader supports books that are:
Books must also be available in a language supported by your device's Text-to-Speech engine.
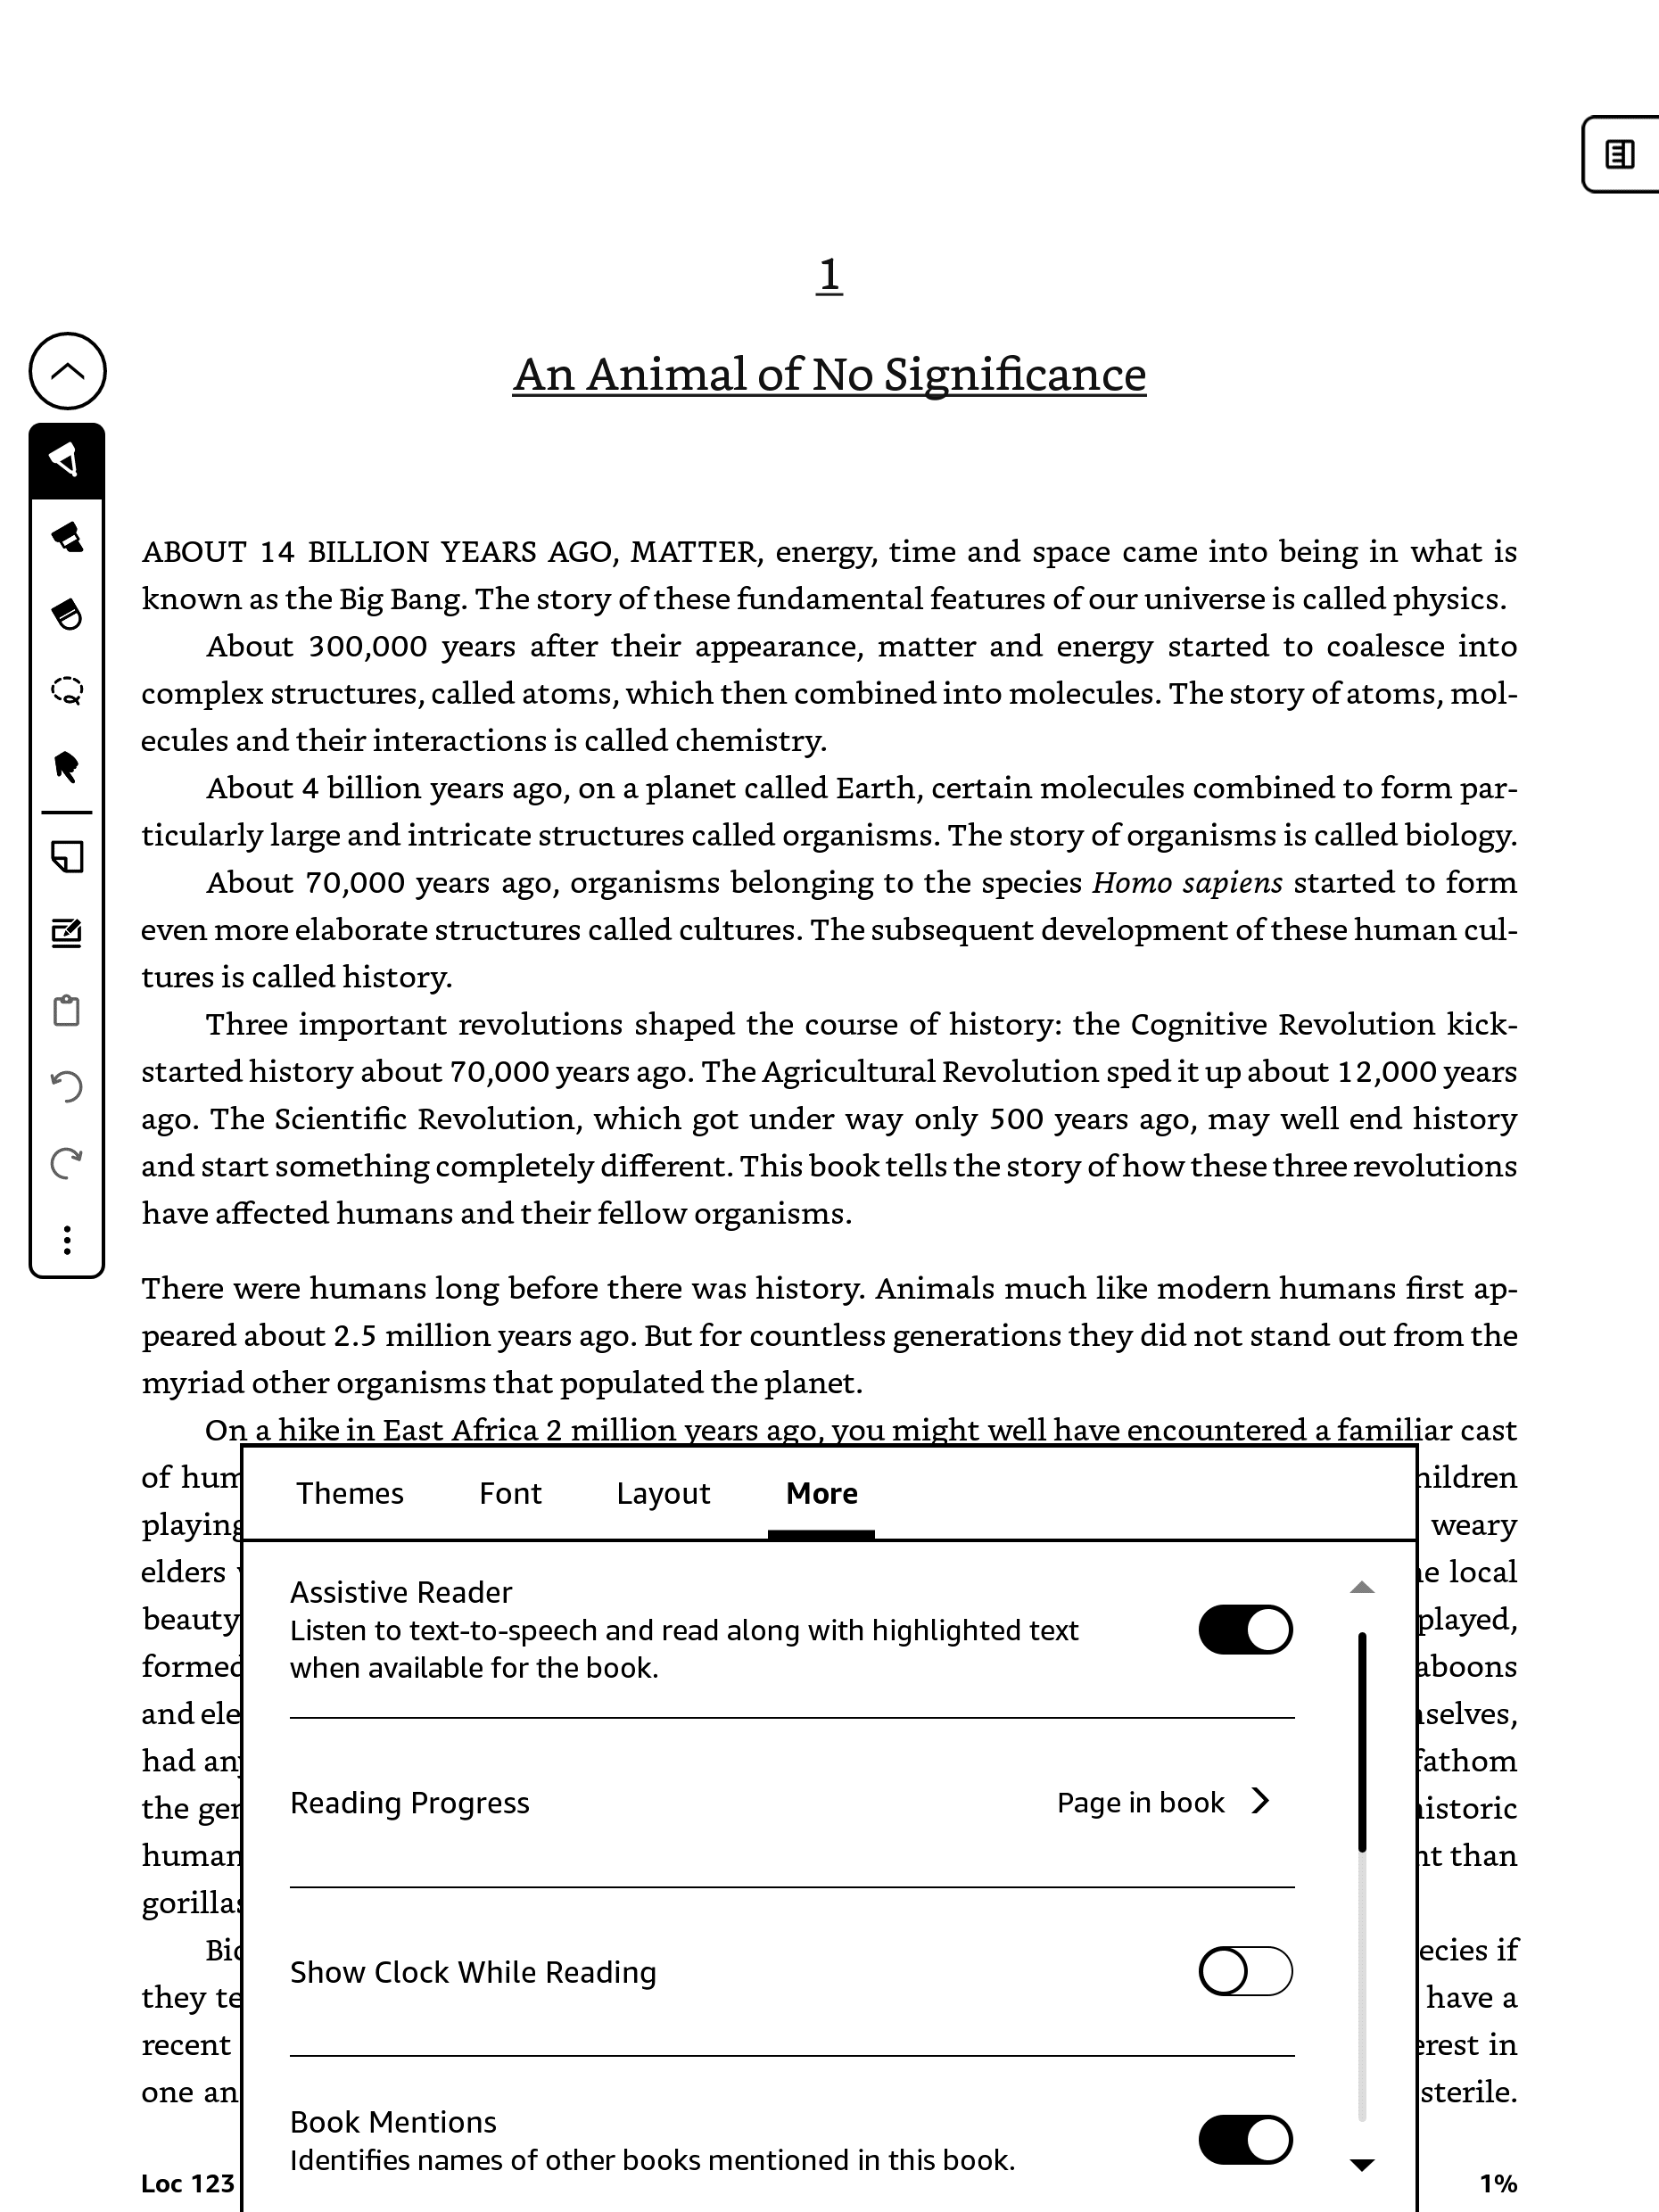
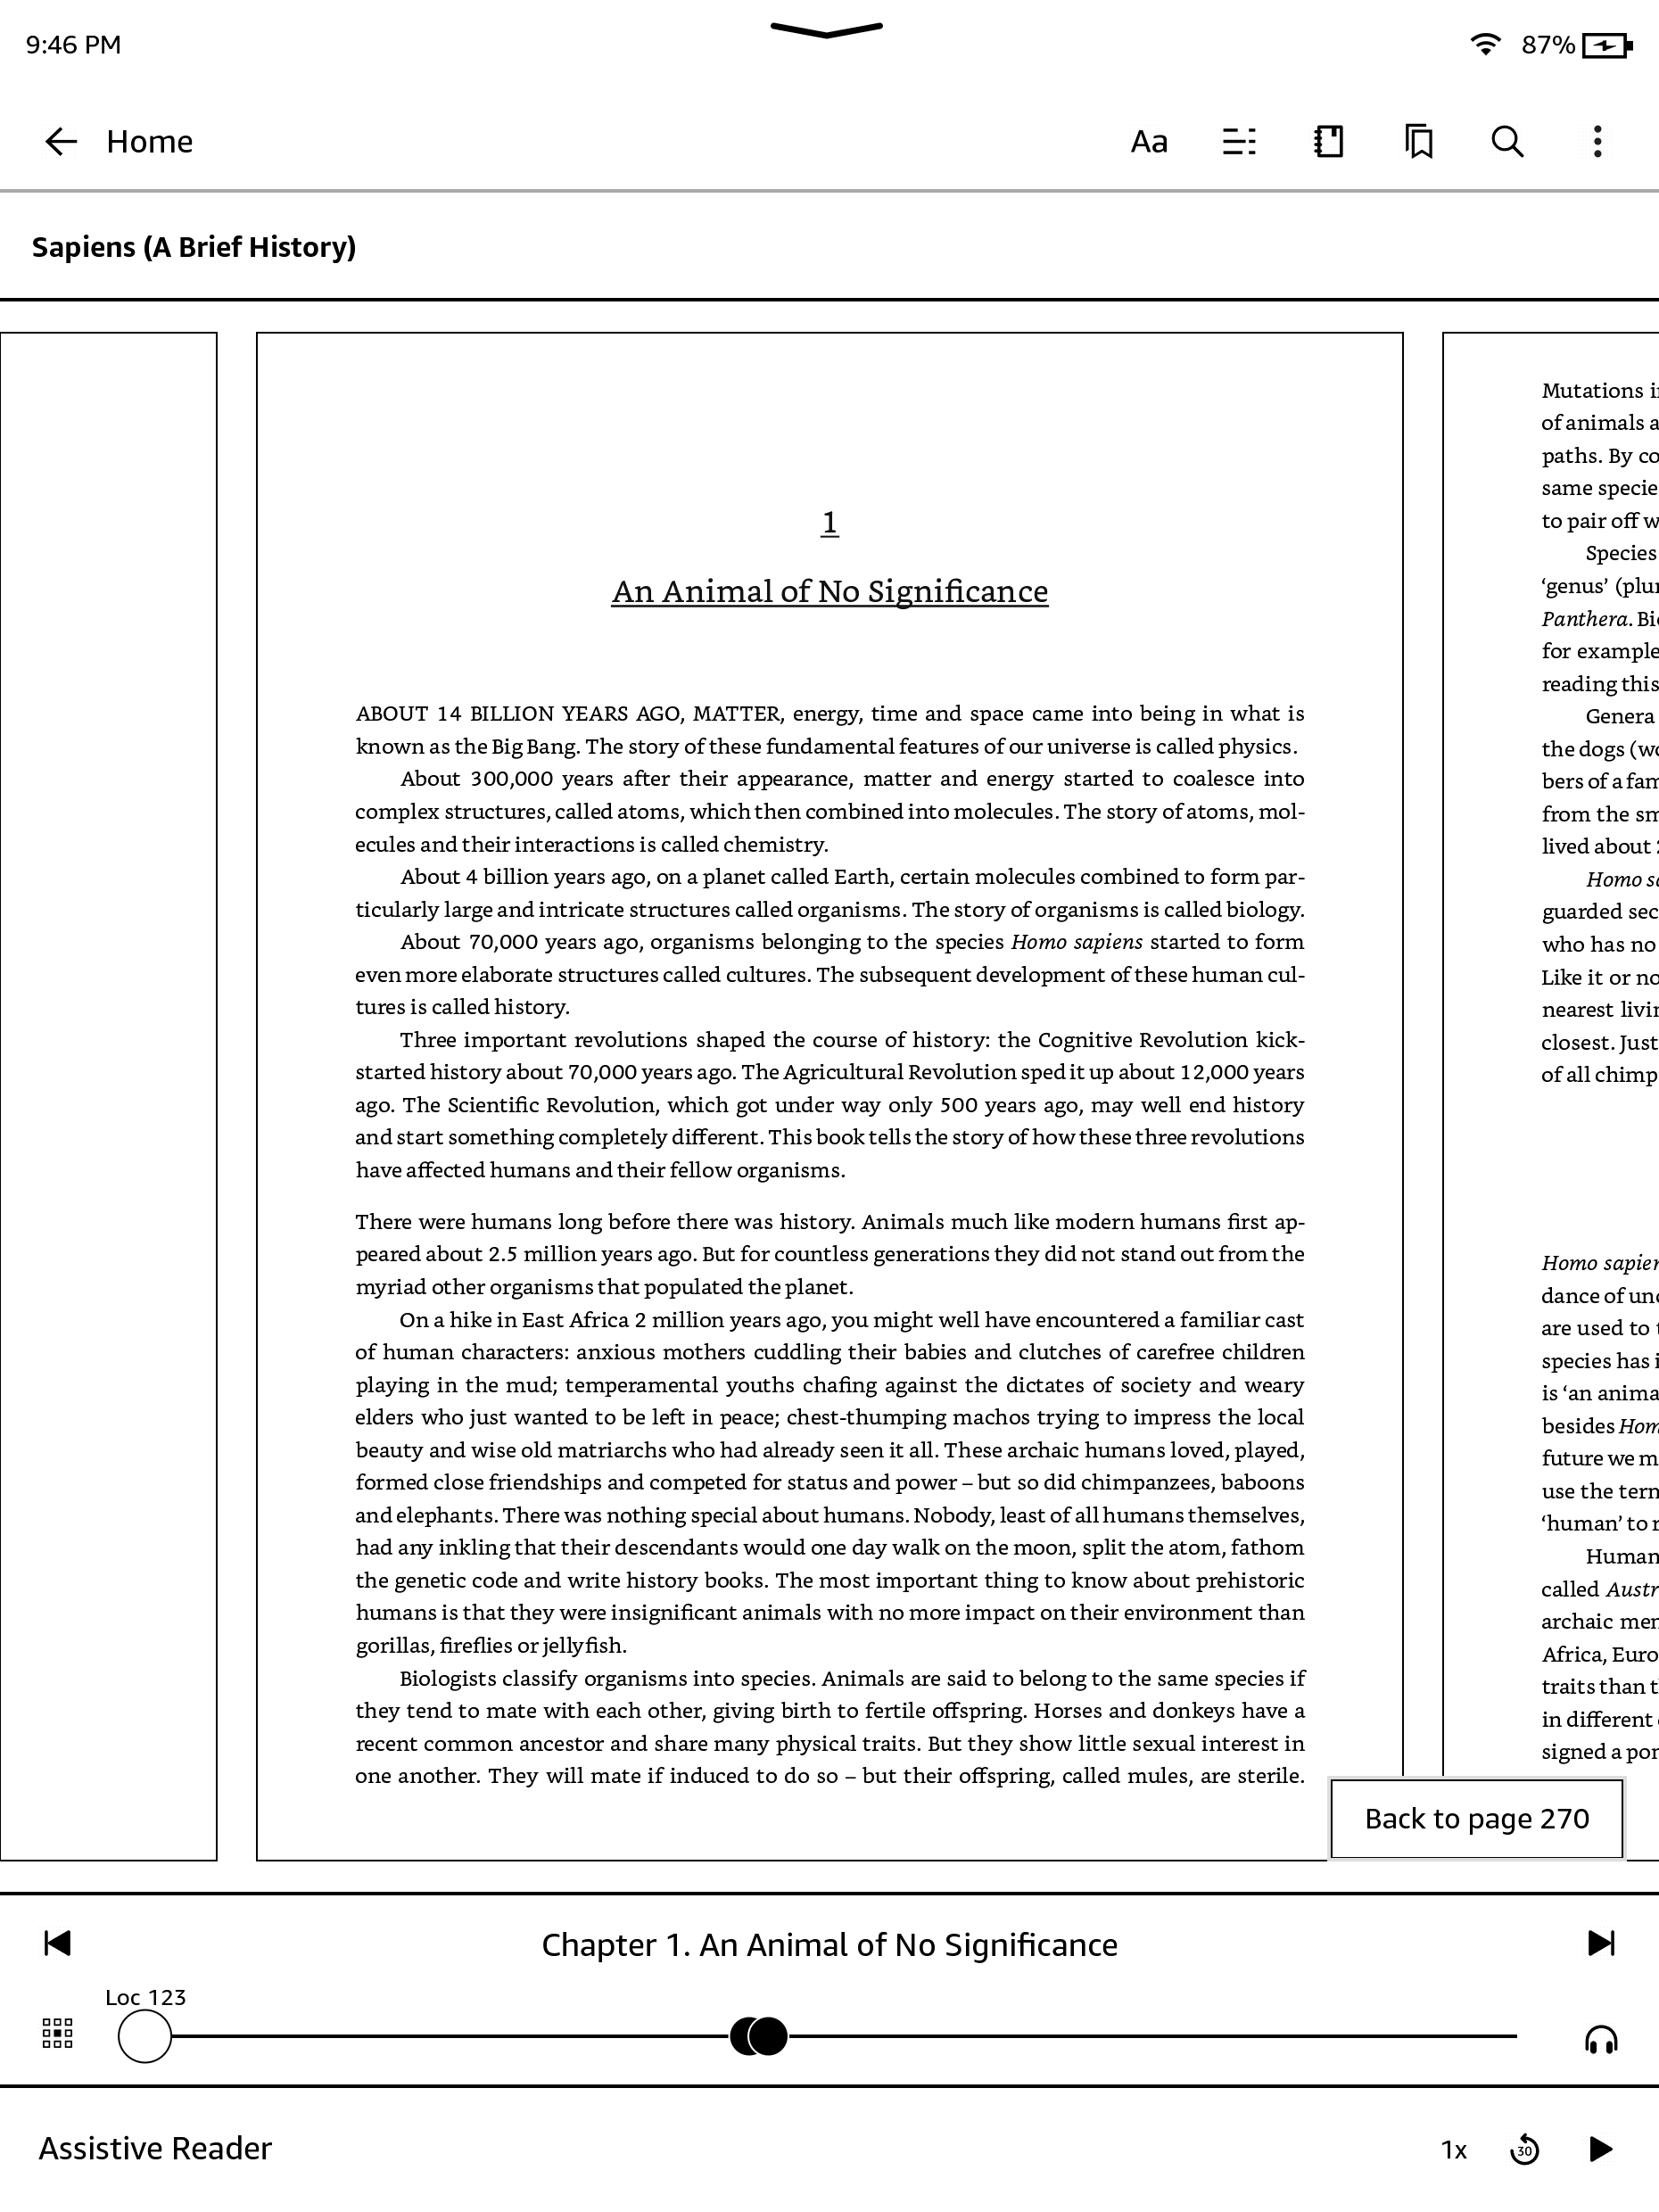
To go to the Settings page, Open the Quick Actions menu, then tap the All Settings icon (). You can also tap the More menu from the Home screen, and select Settings. Your Kindle must be registered to view all settings. Settings are grouped into categories: Your account, Wi-Fi and Bluetooth, Device options, Pen settings, Screen and brightness, Accessibility, Home, Library, and Notebooks, Help, and Legal and compliance.
Amazon Family: Add individuals to your Amazon Family to share content. For more information, see Managing your Amazon Family (formerly known as Amazon Household). This feature is currently only available in the United States, United Kingdom, and Germany.
Parental control: Use this option to set parental restrictions and parental control PIN.
Deregister device: Use this option to deregister your Kindle. This will remove all content from the device and many features associated with your account will not work. Items you purchased from an Amazon store will remain available in the Cloud and can be downloaded again. After deregistering, you can register your Kindle to another Amazon account.
Goodreads: Allows you to link your Kindle to your Goodreads account so you can share highlights with your friends.
Send to Kindle Email: Indicates the address to which documents should be emailed so that they can be sent to your Kindle. Document formats supported by the conversion service will be converted to Kindle format. (Charges may apply.) To learn more about this feature, go to www.amazon.com/devicesupport.
Airplane Mode: When selected, your Kindle will be placed in Airplane Mode and you will have no wireless connectivity.
Wi-Fi Networks: Use this option to connect to a Wi-Fi network, display a list of available networks, and view the name of the Wi-Fi network you are currently connected to, if any.
Delete Wi-Fi Passwords: Delete Wi-Fi passwords saved to Amazon from this device. For more information, see Managing your saved Wi-Fi passwords.
Bluetooth: Use this option to turn on Bluetooth.
Bluetooth Devices: Add, remove, and view available Bluetooth audio devices. Your Kindle can be paired with many Bluetooth enabled devices, including headphones and speakers.
Volume: Adjust the volume of Bluetooth audio.
Device Info: Displays your device's name and generation, Wi-Fi MAC address, serial number, network capability, firmware version, and free space available. Use this setting to change the device name displayed in the upper left corner of the Home screen. If your Kindle has been recently updated, tap the What's New button under this setting to find information about the update.
Software updates: Installs the latest software for your Kindle.
Date and time: Use this setting to change the current local time displayed at the top of the screen. To view the time from within a book, tap the top of the screen.
Language and dictionaries: Enables you to manage language options for your Kindle.
Privacy and security: Set a device PIN and manage data sharing.
Storage Management: Manage items downloaded to your device.
Sync: Enable and disable the automatic backup of your annotations, most recent page read, furthest page read, and collections to Amazon’s servers.
Sleep Timer: Set how long your Kindle should wait before turning off the screen. Note that longer times will reduce battery life.
Power saver: Enable or disable a low-power "hibernate" mode. When enabled, the device will use less power when not in use, but will take longer to wake.
Restart: Restarts your Kindle. You will not lose the books, clippings, or other files stored on your Kindle. In the event your Kindle freezes, press and hold the Power button for 9 seconds until the Power dialog box displays and then select Restart. If the Power dialog box does not display, press and hold the Power button for 15 seconds. After the LED light turns amber and blinks 4 times, you can release the Power button.
Factory Reset: Resets your Kindle to its original settings and restarts it. This action will remove all downloaded or transferred content from your Kindle, and your settings will not be saved. You will still be able to download items from the Cloud. You should select this action only if instructed to do so by Kindle Customer Service. Before you reset your Kindle to its defaults, you must back up any personal documents that you'd like to keep. Once your Kindle restarts, you will need to register and download your items from the Cloud. If you want to PIN-protect your Kindle, you must also set up a PIN again.
Shortcut button: Enables you to choose what shortcut tool to use when holding the shortcut button on the Premium Pen.
Show covers on lock screen: Lets you show the cover of what you are currently reading on the lock screen.
Appearance: Lets you set your screen to light or dark mode. Inverts the text, image, and page color on all screens. For dark mode the display background will be black and text will be white.Brightness and warmth: Enables you to adjust your screen’s brightness and warmth.
Lock screen rotation: Prevent your screen from rotating 180 degrees when moving your Kindle.
Display & text size: You can change the size of the font for your Kindle's user interface to make it easier to read. Drag or tap on the slider to choose the font size you want. Larger font sizes will affect the amount of content that is displayed on some pages.
Reduce brightness at night: Gradually decreases screen brightness over time as your eyes adjust to the dark.
VoiceView Screen Reader: Allows you to toggle VoiceView on and off. The VoiceView screen reader enables you to navigate your Kindle using special gestures, receive voice guidance when you interact with items on the screen, and listen to millions of books.
Display & text size: You can change the size of the font for your Kindle's user interface to make it easier to read. Drag or tap on the slider to choose the font size you want. Larger font sizes will affect the amount of content that is displayed on some pages.
Library tab: Manage how content appears in your Library tab.
Book and notebook options: Manage your reading and writing experience.
Use this setting to troubleshoot issues on the device by accessing help content and to provide feedback. A wireless connection is required.
Tutorials: Learn about new features with contextual pop-ups.
Contact us: Contact Kindle Customer Service for assistance, and feature requests.
Use this setting to view the Legal Notices and Safety and Compliance information about your Kindle.
When you're on the Settings page, tapping the overflow menu (the three dot icon) displays additional options:
Device Info: Displays your device's name and generation, Wi-Fi MAC address, serial number, network capability, firmware version, and free space available. If your Kindle has been recently updated, you will find information about the update under this setting.
Restart: Restarts your Kindle. You will not lose the books, clippings, or other files stored on your Kindle. In the event your Kindle freezes, press and hold the Power button for 9 seconds until the Power dialog box displays and then select Restart. If the Power dialog box does not display, press and hold the Power button for 15 seconds. After the LED light turns amber and blinks 4 times, you can release the Power button.
Reset to factory default: Resets your Kindle to its original settings and restarts it. This action will remove all downloaded or transferred content from your Kindle, and your settings will not be saved. You will still be able to download items from the Cloud. You should select this action only if instructed to do so by Kindle Customer Service. Before you reset your Kindle to its defaults, you must back up any personal documents that you'd like to keep. Once your Kindle restarts, you will need to register and download your items from the Cloud. If you want to passcode-protect your Kindle, you must also set up a passcode again.
The Kindle Customer Service website at www.amazon.com/devicesupport has helpful information, including frequently asked questions and how-to videos.
KD20200606-A